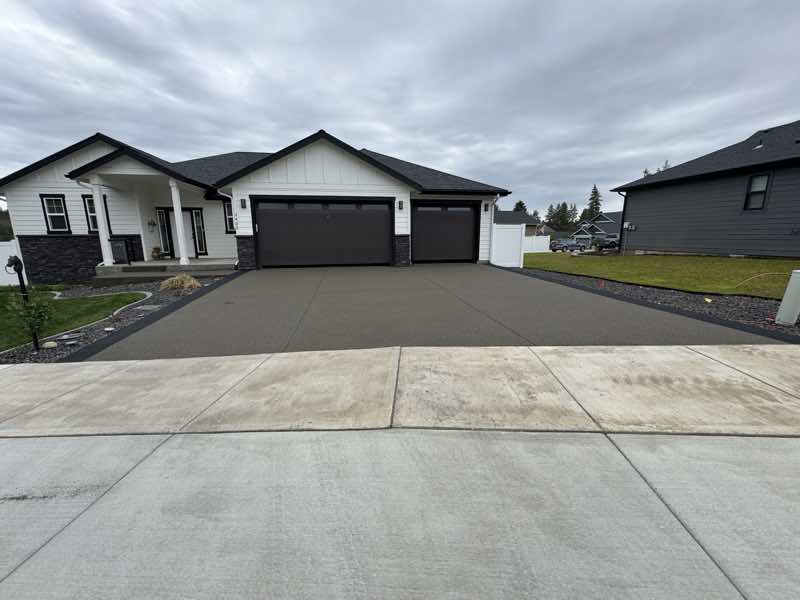
Want your patio or driveway to look like expensive stone pavers without the high price? You're not alone. Thousands of Spokane homeowners ask this same question every spring when it's time to start outdoor projects. Our area has tough winters with lots of freezing and thawing, so picking the right outdoor surface really matters.
This guide explains everything about decorative stamped concrete for Spokane homes. You'll learn what it really costs, how long it lasts through harsh winters, what care it needs, and why doing it yourself usually doesn't work out well.
We'll cover what makes decorative concrete different from regular concrete, real prices compared to pavers and other options, how well it holds up in our weather, what maintenance looks like, and when DIY becomes an expensive mistake. By the end, you'll know if stamped concrete is right for your home and budget.
Is Decorative Stamped Concrete Cheaper Than Pavers?
Yes, decorative stamped concrete costs 30-50% less than stone pavers and looks almost as good. In Spokane, you'll pay between $8-18 per square foot for stamped concrete installed by professionals. Pavers cost $15-30+ per square foot or more.
Here's how different outdoor surfaces compare on cost:
Stamped concrete: $8-18 per square foot installed. Most Spokane projects cost $11-14 per square foot based on the pattern and colors you pick.
Concrete pavers: $15-30 per square foot installed. Fancy imported pavers can cost $35+ per square foot.
Plain concrete: $4-8 per square foot for standard gray concrete with a basic finish.
Natural stone: $25-50 per square foot installed. Premium stones like bluestone cost over $60 per square foot.
Stamped concrete costs less because it goes in faster and uses less material than pavers placed one by one. A typical 400 square foot patio takes 2-3 days for stamped concrete versus 4-6 days for pavers. Less time means lower labor costs.
However, stamped concrete needs professional sealing every 2-3 years to keep looking good and stay protected from weather. This maintenance costs about $1-2.50 per square foot each time. Add this to your long-term budget.
Stamped Concrete Lifespan and Durability in Spokane's Climate
When installed right and cared for properly, stamped concrete lasts 20-30+ years, even in tough weather. But Spokane has special challenges that affect how long your concrete surfaces look good and work well.
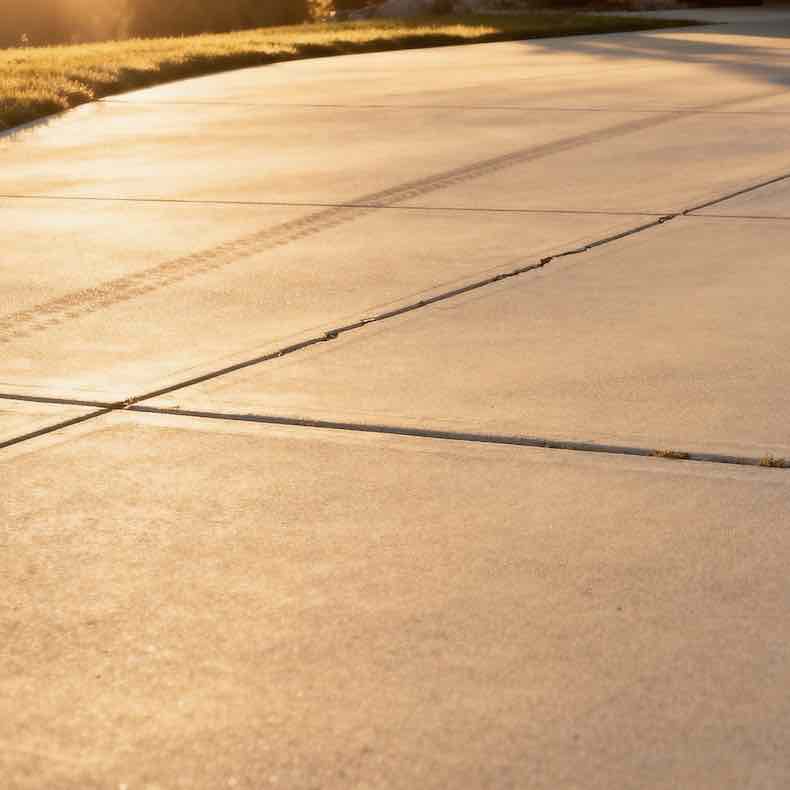
Our area gets about 73-87 freeze-thaw cycles each winter, according to National Oceanic and Atmospheric Administration weather data for Spokane. A freeze-thaw cycle happens when temperatures drop below freezing at night and rise above freezing during the day. Water that gets into concrete pores grows by about 9% when it freezes. This creates pressure inside that slowly causes cracks and damage.
That's almost three times more freeze-thaw cycles than Seattle gets. It's also way more than Portland or other milder Northwest cities face. Add in Spokane's 60-80 degree temperature swings between summer and winter, plus strong sun during summer months. You can see why concrete surfaces age faster here than in other places.
The most common problems with stamped concrete in our weather include surface cracks from freeze-thaw damage, fading colors from sun exposure, sealer wearing away from temperature changes, and the top layer flaking or peeling off. These issues usually show up after 7-10 years when sealing gets skipped or when shortcuts were taken during installation.
How does this compare to pavers? Concrete and stone pavers usually last 25-50 years before needing replacement. That's a bit longer than stamped concrete. But pavers have their own problems in Spokane weather. Freeze-thaw cycles make pavers shift and settle unevenly. This creates tripping hazards and means you need to level them again later. Sand between pavers washes out during heavy rains and snow melt. You have to add more sand regularly. Weeds grow fast through paver joints during summer and need constant pulling.
Professional installation makes a huge difference in how long stamped concrete lasts. Proper installation includes good base preparation with 4-6 inches of packed gravel, the right concrete thickness for how you'll use it (4 inches minimum for patios, 6 inches for driveways), expansion joints placed smart to control cracks, and thorough sealing once the concrete has dried properly.
We recently completed a 400 square foot stamped patio in Liberty Lake with a slate pattern and earth-tone colors. The project needed extra base work because of the clay soil common in that area. Clay expands and shrinks with moisture changes. By fixing the base properly and putting expansion joints every 10 feet, we made a surface built to handle both soil movement and freeze-thaw cycles that Liberty Lake properties face.
When stamped concrete fails too early in Spokane, it's almost always from one of three things: bad base preparation that lets settling happen, missing or wrong expansion joints that don't control cracks, or skipped sealing that lets moisture get in. The concrete itself rarely fails. It's the preparation and care that decide if you get 10 years or 30+ years from your investment.
What Is Decorative Stamped Concrete? (And How It Differs from Standard Concrete)
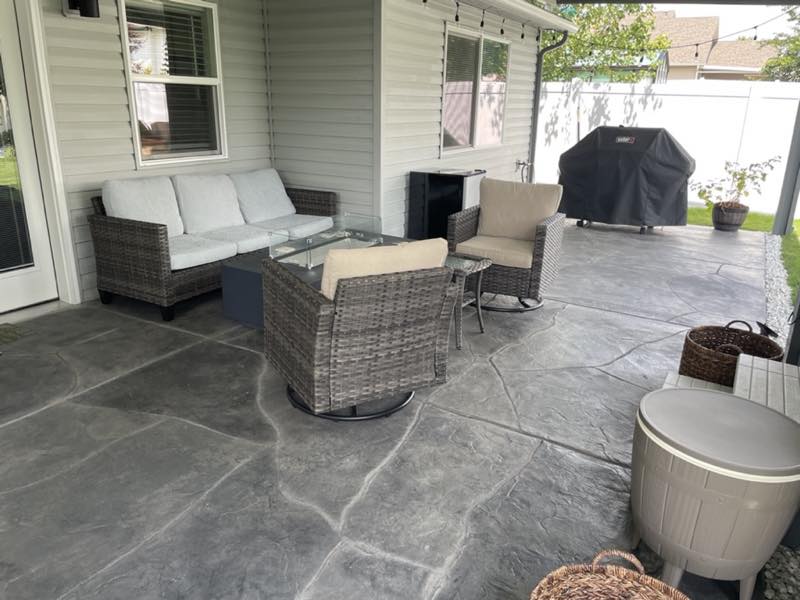
Stamped concrete is regular concrete that gets patterns and textures pressed into it while it's still wet. This makes it look like stone, brick, slate, wood, or other materials. The process works like this: pour concrete, spread colored powder on the surface, press large rubber stamps into the concrete to create texture and pattern, remove stamps before concrete fully hardens, then seal the surface once it has dried.
The term "decorative concrete" covers several ways to make concrete look better, not just stamping. Decorative concrete can include colored concrete with pigment mixed in, stained concrete with dye added after it dries, engraved concrete with patterns cut into hard surfaces, and polished concrete with a shiny finish. Stamped concrete is just one type of decorative concrete, but it's very popular for outdoor use.
Common stamp patterns you can get for Spokane projects include slate stone that looks like random flat stones, cobblestone with rounded stone texture, ashlar slate with rectangle stone patterns, wood plank that looks like hardwood or deck boards, seamless texture with subtle organic appearance, and running bond brick that looks like traditional brick pavers.
Based on our Spokane projects over the past five years, the most popular patterns are slate stone for patios and pool decks, ashlar slate for entryways and front walks, and wood plank for outdoor living spaces. Homeowners like the wood plank pattern because they can get the look of expensive deck boards with concrete's toughness.
Color gets added two main ways. Integral color means adding pigment right into the concrete mix before pouring. This creates color all the way through, not just on top. This works better long-term because color doesn't show wear as much if the surface chips. Stains and dyes put on after concrete dries offer more dramatic color changes. They can create multi-colored looks that copy natural stone better. But they need more frequent sealing to keep colors bright.
Most Spokane homeowners pick integral color because it lasts better in our weather. They often add a contrasting powder during stamping to create subtle color changes that add depth. Earth tones—tans, browns, grays, and terra cottas—stay popular because they match Spokane's natural scenery and hide the dust and pine needles we all deal with.
Decorative Stamped Concrete Cost: What Spokane Homeowners Actually Pay
Real stamped concrete costs in Spokane range from $8-18 per square foot for complete professional work. Most projects fall in the $11-14 per square foot range. The final price depends on several things.
Project size matters a lot for your per-square-foot cost. Bigger projects cost less per square foot because setup work—renting equipment, delivering materials, bringing the crew—gets spread over more area. A small 200 square foot entry pad might cost $16-18 per square foot. A 600 square foot patio might cost $11-13 per square foot for the same pattern and colors.
Pattern complexity affects both material costs and labor time. Simple patterns like seamless texture or basic slate add little cost. Fancy patterns like ashlar slate, cobblestone, or wood plank take more time for stamping. These raise costs by $2-4 per square foot. Patterns with multiple stamps that must line up just right take longer to install correctly. That labor time means higher project costs.
Color choices change pricing too. Single-color concrete with one pigment costs less than multi-colored surfaces. Surfaces that need mixed-in color plus contrasting powder plus stains after drying cost more. Each extra color layer adds $1-2 per square foot to the project cost.
Site preparation and access are hidden costs many homeowners miss during planning. South Hill properties often have slopes that need concrete pumping instead of pouring straight from the truck. This adds $600-1,200 to costs depending on distance. Clay soils common in Liberty Lake and parts of Spokane Valley need more digging and packed gravel. This can add $2-3 per square foot. Removing old concrete when replacing old patios or driveways adds $2-5 per square foot depending on thickness.
Border and edge treatments also affect final costs. Sawcut lines provide the cheapest option for controlling cracks but you can see them clearly. Decorative borders using different colors or patterns look nice but raise costs by $8-15 per linear foot. Borders stamped with the same pattern as the main area but in a different color offer a middle option at $5-10 per linear foot.
Let's look at a real recent project to show these numbers clearly. A 400 square foot stamped patio in Liberty Lake had a slate pattern with two earth colors—tan mixed-in color with brown powder. The project included removing an old 4-inch concrete slab, 6 inches of new packed gravel base, 4 inches of new stamped concrete with fiber reinforcement, and first sealing. The final cost was $5,200, or $13 per square foot. This was in the middle of our typical price range because the slate pattern added medium difficulty, the two colors needed extra materials, and the clay soil needed better-than-usual base work.
For comparison, plain concrete for the same patio without stamping or colors would have cost about $3,200-3,600. That's a savings of about $1,600-2,000. But pavers covering the same 400 square feet would have cost $6,000-12,000 depending on which pavers you picked. That's $800-6,800 more than the stamped option. Natural stone would have cost $10,000-20,000, making stamped concrete look very affordable.
When budgeting for stamped concrete, remember these extra costs beyond the first install. Professional sealing every 2-3 years costs $400-1,000 for a typical patio ($1-2.50 per square foot). That means you'll spend about $2,000-4,000 on sealing over 20 years. Small crack repairs if they happen cost $200-600 depending on how bad they are. Cleaning and care supplies cost $50-100 per year.
Timing your project can change costs too. April through mid-May is peak season in Spokane. Everyone wants their outdoor surfaces ready for summer. Contractors often charge higher rates during this busy time. September and early October offer shoulder season pricing that may save 10-15%. The concrete still has time to cure right before winter. Avoid late October and November installs. Cold temperatures during drying can hurt long-term strength.
Stamped Concrete Maintenance: What's Required and How Often
Stamped concrete needs less care than many homeowners expect. But the care you do perform directly affects whether your surface lasts 15 years or 30+ years. Understanding what's really needed helps you decide if this investment fits your lifestyle and available time.
Regular maintenance means sweeping or blowing off leaves, pine needles, and debris weekly during fall and spring. Built-up plant matter holds moisture against the concrete surface. This speeds up damage and makes surfaces slippery. Mild soap and water cleaning every 2-3 months removes surface dirt, prevents stains, and lets you check for problems developing. Don't use harsh chemicals, deicers, and acid-based cleaners. These can damage the sealer and stain the concrete. Pressure washing once or twice a year (at low pressure, 1200-1500 PSI maximum) deep cleans the surface. But do this carefully to avoid damaging the sealer or concrete texture.
The most important care task is professional sealing every 2-3 years. This timing isn't random. It's based on how sealers work in places with lots of freezing and thawing and sun like Spokane has. Sealers protect stamped concrete by stopping water from getting in and causing freeze-thaw damage, blocking sun rays that fade color, fighting stains from oil and plant matter, and making color and pattern look better.
Professional sealing for a typical 400 square foot patio costs $400-1,000 depending on sealer type and surface condition. Better sealers with stronger sun protection and longer life cost more at first. But they may stretch resealing time to 3-4 years instead of 2-3 years. This can save money long-term. High-traffic areas like main entry walks and driveway approaches may need more frequent sealing—every 18-24 months. Foot traffic and car tires wear through sealer faster than weather alone.
Why does DIY sealing often fail? The sealing process looks simple but needs specific conditions and techniques for good results. The surface must be completely clean and dry. This is harder than it sounds. Any moisture, dust, or leftover stuff stops proper sealer sticking. Temperature and humidity must be in certain ranges—usually 50-85 degrees Fahrenheit with low humidity. This creates a narrow window in Spokane's weather. You need even coverage without puddles or thin spots. This takes experience to do right every time. Most DIY failures happen because homeowners put sealer on too thick (creating a milky, peeling mess) or too thin (giving weak protection), don't allow enough drying time between coats, or apply during bad weather.
We suggest sealing in late April or early May in Spokane. This is after the last freeze but before summer sun gets strongest. This timing gives the sealer the best conditions to dry right—medium temperatures without rain or frost. It also provides maximum protection going into intense summer sun and fall moisture.
Here's a practical care schedule for Spokane stamped concrete:
Spring (March-May): Clean surface well after winter, check for any cracks or damage, put on fresh sealer if 2-3 years have passed since last time, and fix any small repairs before they get worse.
Summer (June-August): Weekly sweeping or debris removal, monthly cleaning with mild soap and water, watch for standing water that shows settling or drainage problems, and keep planters and furniture off surface during extreme heat.
Fall (September-November): Sweep more often as leaves fall, pressure wash if needed before wet weather arrives, make sure surface is clean going into winter, and check that sealer is still beading water properly.
Winter (December-February): Don't use metal shovels that scratch the surface, use plastic shovels or snow blowers for snow removal, never use chemical deicers or salt, sand gives traction without damaging concrete, and limit use of studded snow tires on stamped driveways.
How does this compare to keeping up pavers? Paver care includes adding sand between joints every 2-3 years as rain and snow melt wash it away, pulling weeds that grow through joints during summer, leveling them again as freeze-thaw cycles cause uneven settling, and replacing single pavers when they crack or break. While pavers don't need sealing for protection, the sand and leveling work often takes more time and effort than sealing stamped concrete.
The key thing about maintenance: it's not how much work but how steady you are that matters. Homeowners who keep up with basic cleaning and stick to their sealing schedule get 25-30+ years from stamped concrete. Those who skip sealing for 4-5 years or longer often face major damage. This needs expensive repairs or replacement by year 12-15. The $500 you save by skipping one sealing can easily cost you $3,000-5,000 in early replacement.
Cheaper Alternatives to Stamped Concrete (And Their Trade-offs)
Several lower-cost options exist instead of stamped concrete. Being honest about when they make sense shows we care about your best outcome, not just making a sale. Understanding these options and their limits helps you make the right choice for your situation and budget.
Plain concrete with acid stain is the cheapest decorative option at $3-8 per square foot. This means pouring standard concrete and putting on stains after it dries to add color and visual interest. Good things include much lower cost than stamped concrete, easier DIY work for homeowners comfortable with basic concrete, and good strength for the price. But the look is limited. You get color changes but no texture or pattern. It still obviously looks like concrete instead of copying stone or other materials. Staining can be unpredictable with blotchy results if not done well. This option works well for garage floors, basement spaces, or work areas where budget matters more than upscale looks.
Concrete pavers cost $10-20 per square foot for standard options. Fancy pavers can reach $25-30 per square foot. These are single concrete pieces made in factories and put in over a gravel and sand base. The modular nature gives real advantages. Single damaged pavers can be replaced without messing up surrounding surfaces. Colors tend to be more even than poured concrete. Some design flexibility exists with mixed colors and patterns. But beyond the higher cost, pavers face big challenges in Spokane weather. Freeze-thaw cycles cause shifting and settling that creates uneven walking surfaces. Sand between joints washes out and needs regular adding back. Weeds grow fast through joints during summer. The install process takes much longer than stamped concrete. Pavers make the most sense when you need access to underground pipes or when you specifically want the broken-up look instead of a smooth surface.
Gravel or crushed stone is the cheapest option at $2-5 per square foot for basic gravel. Fancy river rock or crushed granite costs more. The drainage benefits are clear—water flows through freely without puddles or ice forming. But function limits make this work only for specific uses. Snow removal becomes nearly impossible as shovels pick up gravel along with snow. Car traffic slowly spreads gravel outside where you want it. Plant debris mixes with stone and looks messy. Walking on gravel is hard for anyone with mobility problems. This option works for garden paths, dog runs, or areas where you need excellent drainage and don't mind the casual look.
Asphalt works only for driveways and costs $3-7 per square foot. This makes it cheaper than stamped concrete at first. But asphalt has a much shorter life in Spokane weather—usually 12-20 years versus 25-30 for concrete. It needs seal coating every 2-3 years like concrete sealing. The black surface soaks up heat, making it uncomfortable for bare feet. It's less suitable for spaces next to outdoor living areas. Sun and temperature extremes cause faster breakdown than concrete faces. For pure driveway function on a tight budget, asphalt works. But it offers none of the looks that stamped concrete provides.
Why "cheapest" isn't always most cost-effective becomes clear when you add up total cost over 20 years. Think about a 400 square foot patio:
Stamped concrete might cost $5,200 at first plus $2,000 in sealing over 20 years. That's $7,200 total with little chance you'll need replacement. Plain concrete might cost $3,400 at first plus $1,500 in sealing over 20 years. That's $4,900 total but with zero look upgrade and higher chance of cracks needing repair or replacement. Pavers might cost $7,200 at first plus $2,500 in sand replacement, releveling, and weed control over 20 years. That's $9,700 total. Gravel at $1,600 at first seems like a deal. But you'll likely replace most of it at least twice over 20 years because it spreads and settles. This brings total costs to $4,000-4,800 while never getting the function or look you wanted.
Last year we worked with a homeowner in Cheney who put in plain concrete five years earlier to save money. Spokane's freeze-thaw cycles had created multiple cracks despite good installation. The gray surface looked industrial instead of residential. After researching decorative options, they chose to cover the existing concrete with a stamped slate pattern. This cost $6,800 for their 480 square foot patio. If they had picked stamped concrete at first, they would have paid about $6,200 and avoided five years of disappointment with their outdoor space. The $600 they saved at first cost them time, frustration, and ultimately more money.
The right alternative depends on what matters most to you. If total budget is your top concern and looks don't matter, plain concrete or gravel might work for you. If you truly value being able to fix parts without disturbing the whole thing and don't mind the higher cost and care, pavers could be right. But for most Spokane homeowners who want a nice-looking, tough, fairly low-care outdoor surface that raises property value, stamped concrete sits in the sweet spot between cost and quality.
Should You DIY a Stamped Concrete Patio? (Spoiler: Probably Not)
The appeal of DIY stamped concrete makes sense. Rental stores have the stamp mats you need. YouTube videos make it look doable. The possible savings seem big. Reality is much less forgiving than tutorial videos show.
Stamped concrete has a very narrow working window that makes timing critical. Once concrete starts its chemical drying process, you have about 60-90 minutes to finish all stamping before the concrete gets too hard to accept stamp marks. This window shrinks a lot in hot weather and grows slightly in cool weather. But you never have the luxury of stopping halfway through or taking a break to rethink your approach. A 400 square foot patio needs you to coordinate concrete delivery, spread and level the pour, put on color powder and release agent, stamp the entire surface with proper alignment and steady pressure, touch up areas where stamps didn't mark fully, and cut control joints—all within that narrow window.
For comparison, experienced professional crews have practiced this dance hundreds of times. They know exactly how to pace the work. First-timers always take too long on early parts, rush through later parts, or panic when concrete starts hardening before stamping is done.
The needed equipment and know-how goes beyond just renting stamp mats. Proper stamped concrete needs bull floats and hand floats for first leveling, special color powders in measured amounts, release agents that stop stamps from sticking, stamp mats in multiple patterns that line up right, tampers or pressure tools to ensure complete marks, special sealers right for stamped surfaces, and the knowledge of when each step must happen. Renting this equipment costs $200-400. This seems like a deal compared to professional install costs until you factor in the value of your time and the cost of mistakes.
Common DIY failures we see regularly include uneven stamp marks where some areas show deep pattern while others barely show, creating an obviously amateur look. Color unevenness or blotching happens when color powders aren't put on evenly or when release agents create unexpected reactions. Early cracking comes from bad base prep, thin concrete, missing expansion joints, or poor drying practices. Surface scaling and flaking develops when concrete wasn't properly finished before stamping, trapping air or extra water near the surface. Poor sealing leads to fast damage because DIYers put sealer on too soon, too thick, or during wrong weather.
The cost of fixing DIY mistakes usually exceeds professional install costs. The failed concrete must be completely removed and thrown away before starting over. Last month we removed and replaced a 300 square foot DIY stamped patio in Cheney. Bad base prep caused 2-inch settling in just one winter. The homeowner had saved about $2,400 by doing the work himself. But the removal and replacement cost $4,800—nearly double what professional install would have cost at first. The total spending reached $7,200 for a project that should have cost $3,900-4,500 if done professionally from the start.
What does professional installation actually include that makes the cost worth it? Site review looks at soil conditions, drainage patterns, and existing grade to spot potential problems before they happen. Proper base prep means digging to the right depth, putting in packed gravel base in layers instead of all at once, making sure there's proper slope for drainage, and using mechanical packing equipment instead of hoping for the best. Concrete specs match the use—correct thickness, right fiber or rebar reinforcement, proper mixtures for weather conditions during install, and carefully figured water-cement ratio for best strength and workability.
Professional stamping technique creates even marks across the whole surface, keeps proper pattern alignment at joints and edges, finishes the entire pour within the concrete's working window, and includes skilled touch-up work for crisp, realistic texture. Expansion joint placement follows engineering rules instead of guesswork. Joints appear every 10-12 feet to control cracks at planned spots instead of random places. First sealing happens after the concrete has dried enough but before exposure to harsh weather. We use professional-grade products put on during best conditions.
Maybe most valuable is the warranty and responsibility that comes with professional work. Good contractors stand behind their installs, giving warranties of 2-5 years on workmanship and being available if issues develop. DIY projects come with no warranty except your own willingness to spend more time and money fixing problems.
The honest truth: if you have professional-level concrete finishing experience and have successfully done multiple stamped projects, DIY might save money. If you're trying your first stamped concrete project, you're basically practicing on your own property with permanent results. The risk-reward calculation rarely favors DIY for this particular job.
How to Choose a Stamped Concrete Contractor in Spokane
Picking the right contractor matters as much as choosing stamped concrete in the first place. Spokane homeowners keep saying contractor reliability is their top worry. Will they show up when promised, finish on schedule, and deliver quality work?
Red flags to watch for during your contractor search include companies with no proof of insurance or licensing. Washington State requires contractors doing work over $1,000 to register and keep liability insurance and workers compensation coverage. Requests for large upfront deposits over 50% of project cost or demands for cash payment signal potential problems. Super low bids that come in 30-40% below other estimates usually mean corners will be cut on base prep, concrete thickness, or proper drying time. Pressure tactics pushing you to sign right away without time to compare options or check references suggest the contractor fears you'll discover problems if you research more. Can't or won't provide references from recent local projects raises obvious questions about work quality.
Important questions to ask every contractor include details about winter damage protection. What exactly do they do differently to make sure your stamped concrete survives Spokane's freeze-thaw cycles? The answer should talk about base prep depth, expansion joint placement, concrete thickness specs, and drying procedures. Ask about their base prep process in detail. You want to hear about soil review, specific gravel depth suggestions, mechanical packing methods, and how they handle poor soil conditions. Ask if sealing is included in the first quote or priced separately. Ask what type of sealer they use. Better sealers cost more but protect better and last longer in harsh weather.
Questions about timeline and scheduling matter a lot in Spokane's short construction season. When can they start your project? How long will it take from start to finish? What happens if weather interrupts the schedule? What's their communication process for updates and changes? Warranty coverage deserves clear answers upfront. What specific issues does their warranty cover? For how long? What's the process if you need warranty service?
Quality quotes should include a detailed site review noting any drainage, access, or soil concerns that might affect the project. Material specs should list concrete thickness, PSI strength, rebar or fiber reinforcement, base depth and makeup, and specific pattern and color picks. The scope of work breakdown should clearly describe what's included—tearing out existing surfaces, hauling away debris, base prep, concrete install, stamping and coloring, first sealing, and clean-up. Timeline expectations with realistic start and finish dates help you plan. Clear payment schedules tied to project steps instead of large upfront payments protect both sides. Written warranty terms stating coverage length and specific inclusions give you help if problems develop.
We've finished 847 projects in a row on schedule over the past several years across Spokane metro, from South Hill to Liberty Lake to Cheney and the Coeur d'Alene area. This track record isn't an accident. It comes from realistic scheduling, open communication when weather or unexpected issues come up, and treating your property with the same care we'd want for our own homes. Many of our clients come as referrals from neighbors who've seen our work through multiple Spokane winters.
Every quote we give includes a complete site review to spot any challenges before work begins. We specify our winter-proof prep system that has stopped 95% of winter damage claims over the past five years. This happens through enhanced base prep, smart expansion joints, and premium sealing products built for freeze-thaw weather. Our 10-year warranty on structural strength means we stand behind our work long enough to prove it survives Spokane's harsh conditions. We give clear warranty terms in writing so you know exactly what's covered.
The contractor selection process deserves as much attention as the pattern and color choices. The right contractor delivers not just a beautiful stamped surface but peace of mind that your investment will last decades instead of needing early replacement.
Making the Right Choice for Your Spokane Property
Decorative stamped concrete gives you a nice-looking, tough outdoor surface at much lower cost than natural stone or pavers—usually 30-50% less while looking almost as good. For Spokane properties facing harsh freeze-thaw cycles, strong sun, and big temperature swings, proper installation and care become even more important than in mild climates.
The key points: professionally installed stamped concrete lasts 20-30+ years when cared for properly with sealing every 2-3 years. Starting costs of $8-18 per square foot fit most homeowners' budgets while giving high-end looks. Spokane's tough weather demands winter-specific prep techniques and premium sealing products to reach that 20-30 year lifespan. Professional installation isn't just suggested but essential. DIY attempts often cost more in the long run after adding in removal and replacement of failed work.
When you're ready to transform your outdoor space with stamped concrete built to survive Spokane winters, picking experienced local contractors who understand our area's unique challenges makes all the difference. Concrete Revival specializes in winter-proof concrete systems that have protected hundreds of Spokane properties through years of brutal freeze-thaw cycles.
Ready to see what's possible for your property? Call (509) 608-3211 for a free consultation and clear pricing.